How to Run Your NodeJs Discord Bot on A Raspberry Pi?
Looking for a cheap way to host your Discord Bot, why not use a Raspberry Pi. This article provides step by step instructions for creating your first Discord Bot and running on the Raspberry Pi.
Discord has become the de facto standard voice, chat, and video app used by gamers all over the world. It can be on just about about device include PC, mobile phone, and can even be used on a browser. When chatting, users have the option of sending messages directly or in group chat with up to 10 people.
In addition to having all the standard features you'd expect in a chat app, Discord has embraced the concept of adding "servers" (public and private) where groups of players can get together to discuss common interests or games. These servers are free and easy to create.
One awesome feature of these Discord servers is the ability to create automated users called bots that can do powerful things like kick & ban users, conduct polls, generate memes, hold give aways, and the list goes on and on.
The only kicker is you need to keep the bot running somewhere for it to listen and respond to the commands sent in your server. You could run on your local PC, but you might not keep your local PC on all the time and it would use up precious CPU and memory that could be used for your gaming ;). Another alternative could be run run it on a server in cloud like Azure, but who wants to pay for that every month. Or...you could run it on a Raspberry Pi.
Why the Raspberry Pi?
The Raspberry Pi is the perfect choice to run a Discord Bot IMHO. Why?
- Cost Effective - You can pick up a Raspberry Pi on amazon.com for relatively cheap. I currently use the Raspberry PI 3 Model B+, but I would recommend the Pi 4B if you're going to pick one up. (disclaimer: this is an affiliate link above which helps fund this site)
- Low Power - It's been estimated that if you ran your Raspberry Pi for 24 hours a day for an entire year it would only cost you about $5.
- Adequate Processing - It's got decent enough CPU/Memory/Network capabilities to run your discord bot.
Create your Discord Server
- Login to Discord in a browser at https://discordapp.com/ and login.
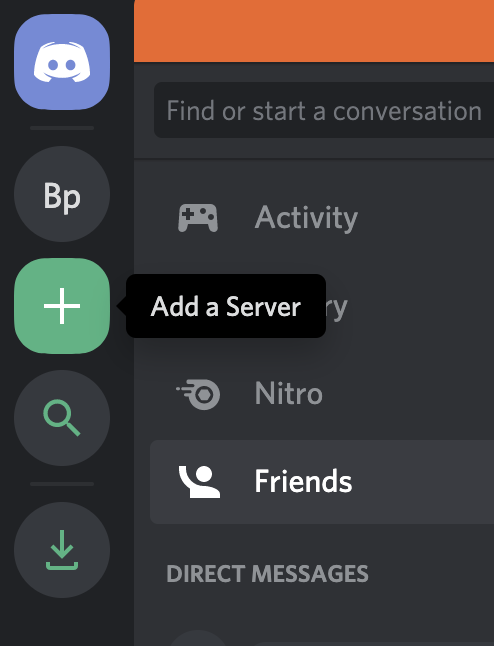
- Once logged, hit plus sign to add a server:
- Select Create a server
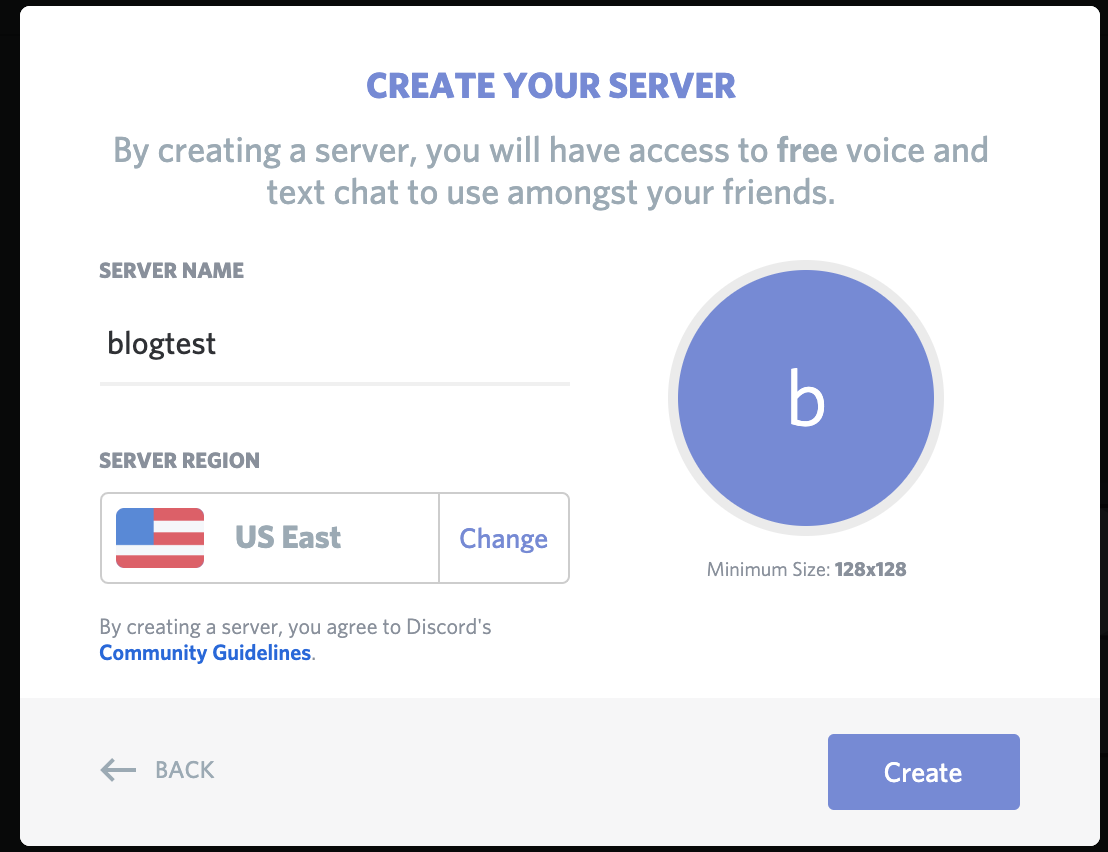
- Provide a server name and select a region and then click the create button:
Congratulations you now have a discord server!
Create your Bot
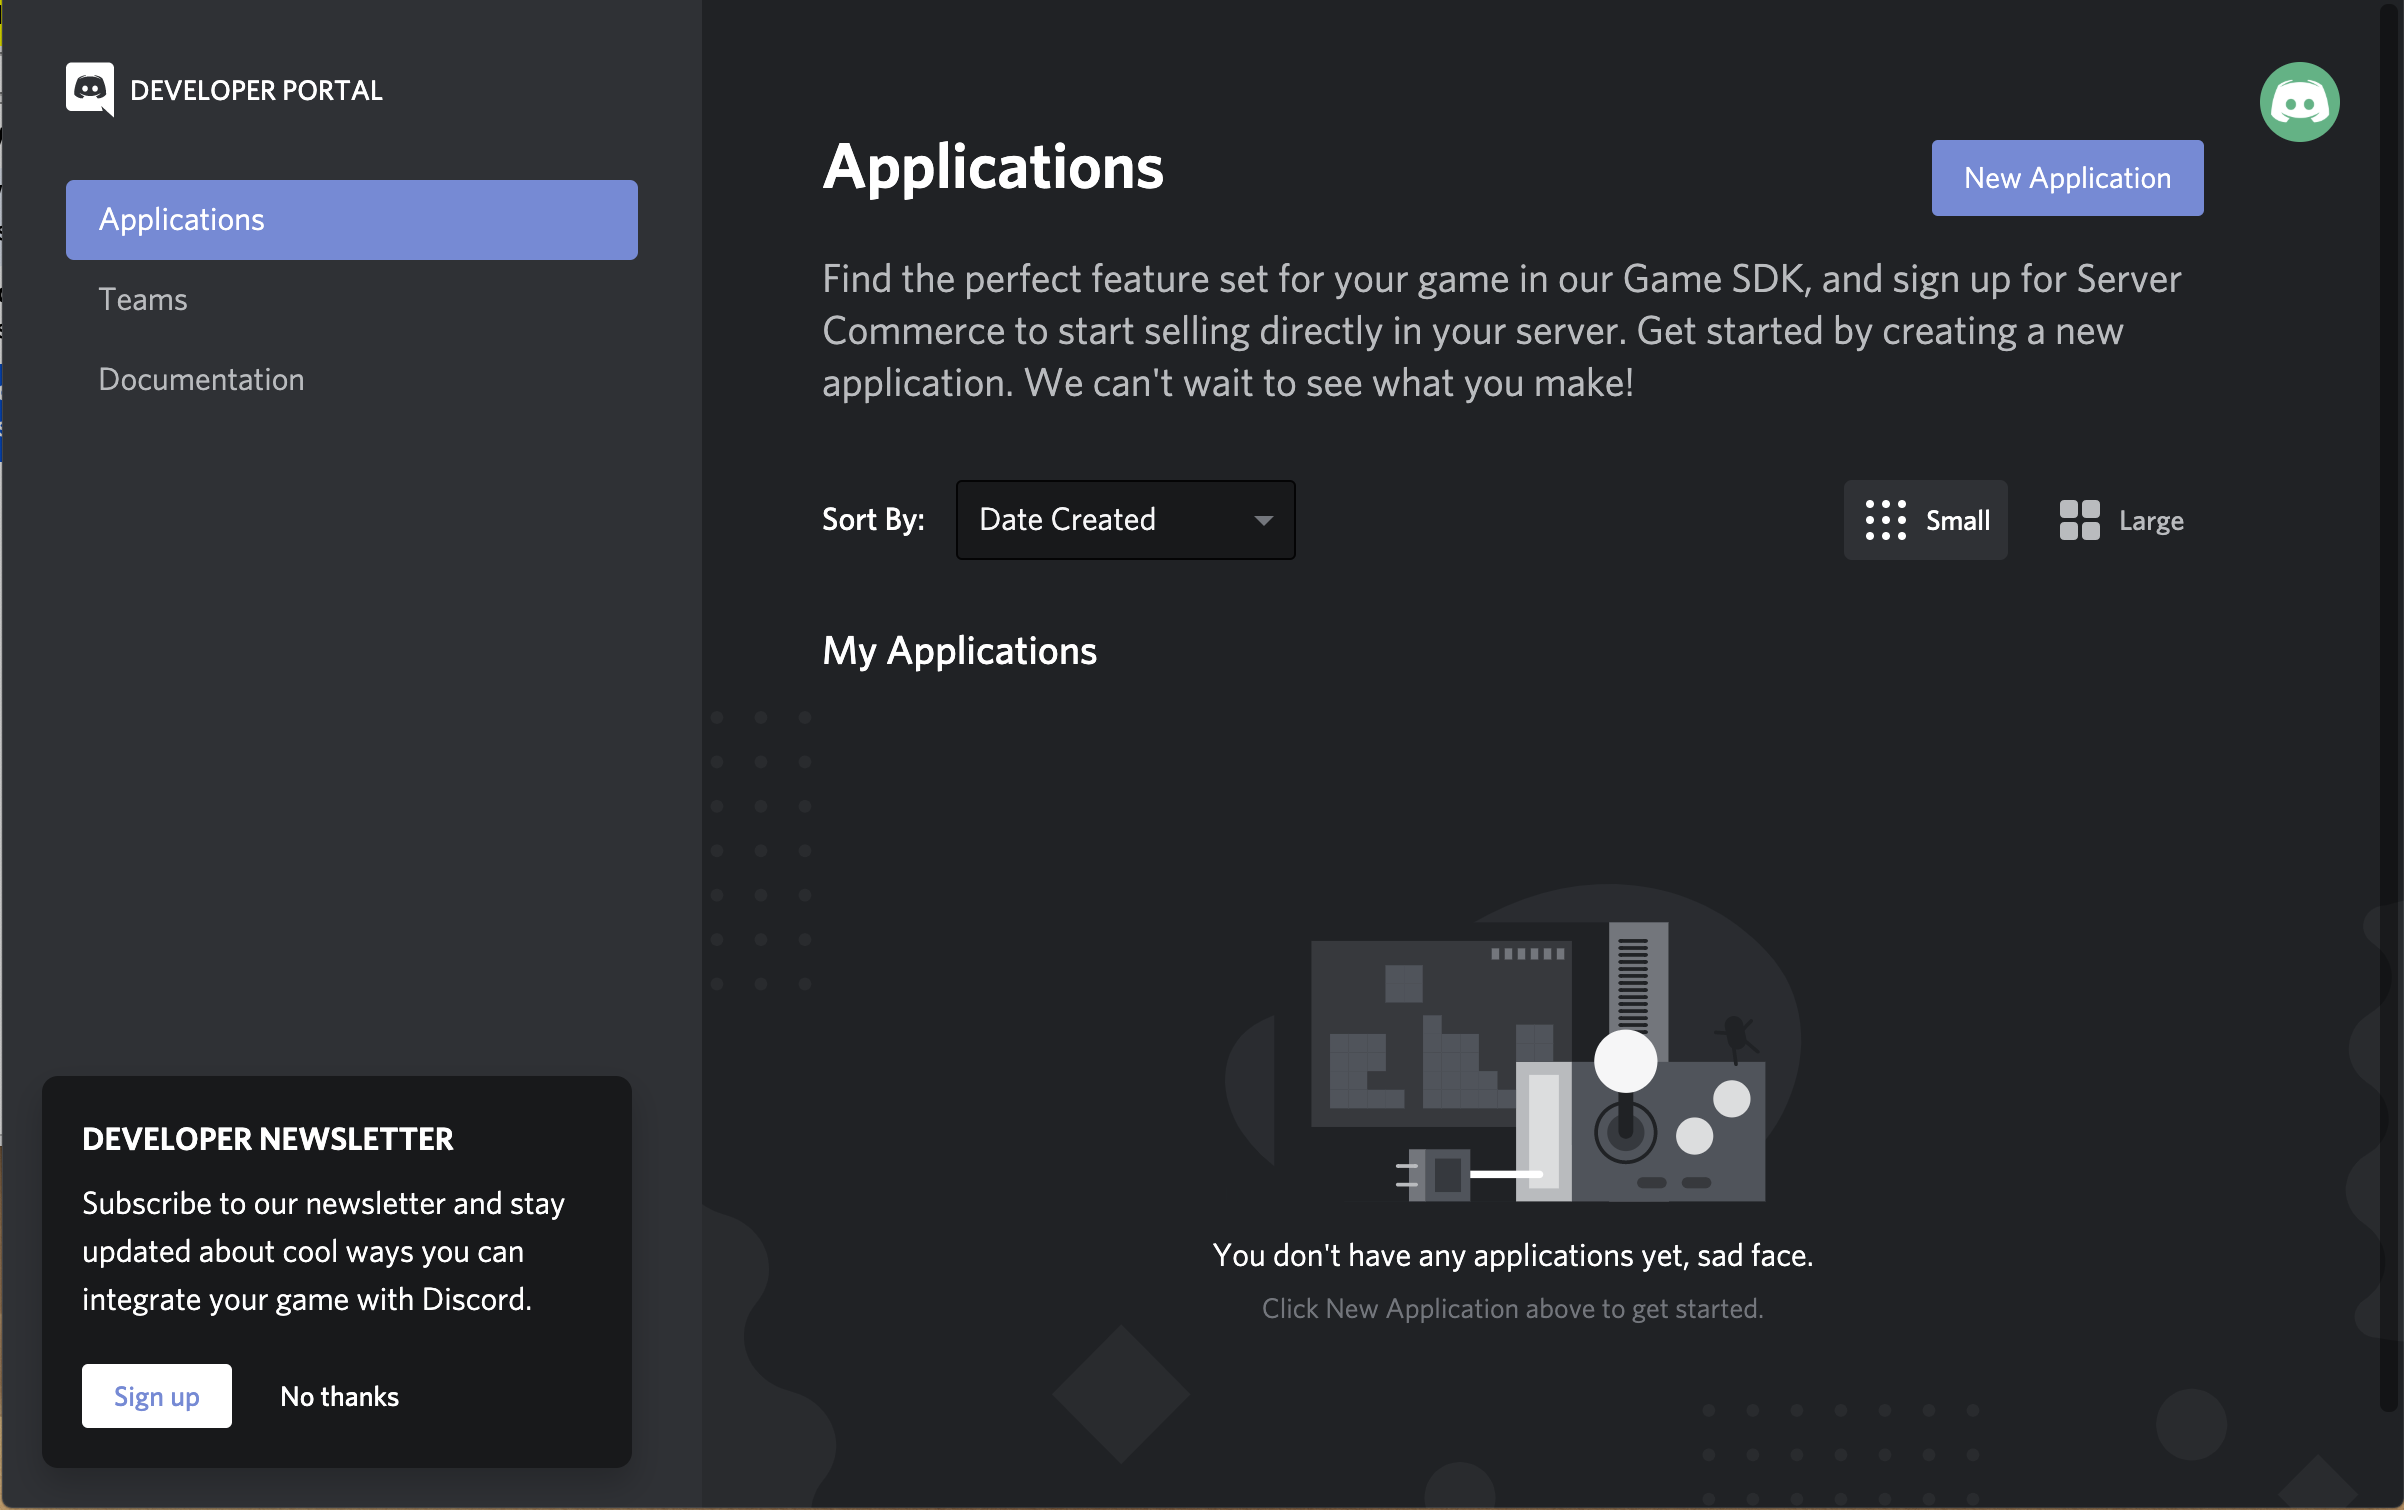
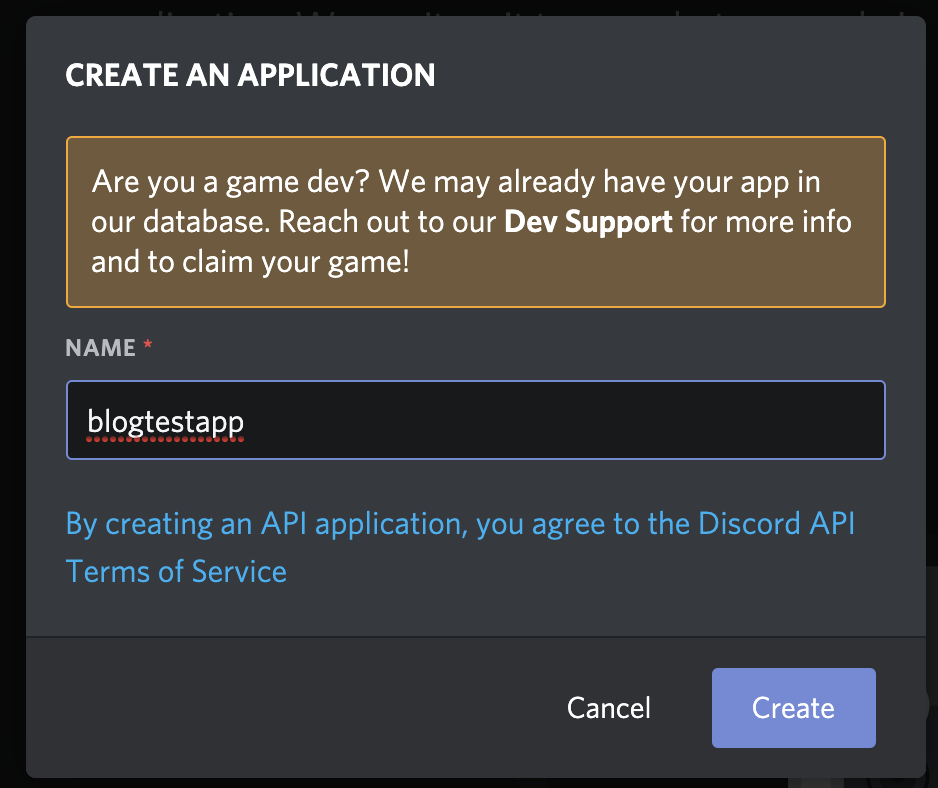
- Navigate to this page: https://discordapp.com/developers/applications and click the 'New Application' button
- Create a name for your application and click the create button:
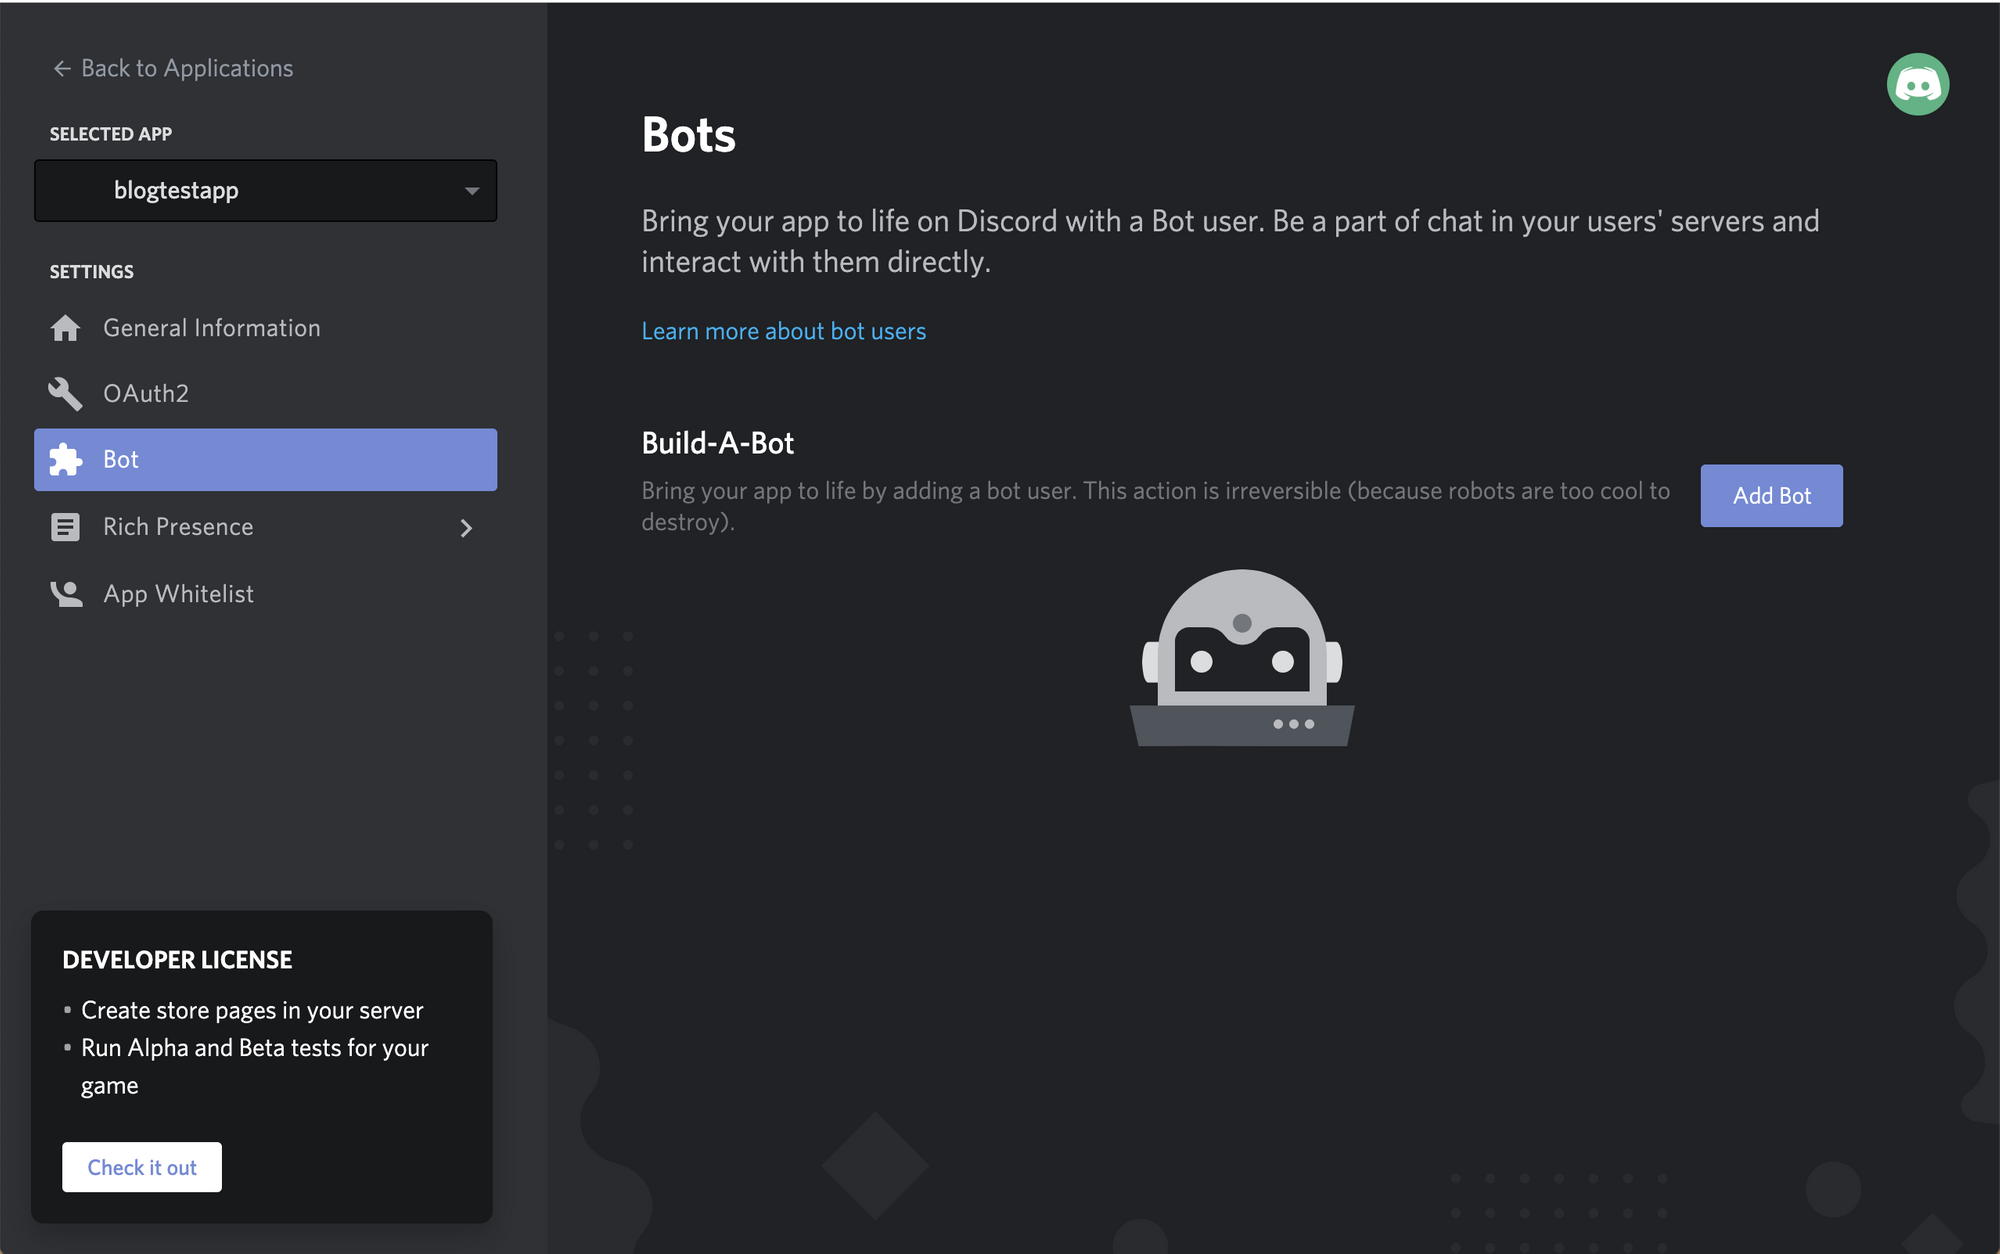
- In the left hand navigation, select the bot link, then click the 'Add Bot' button.
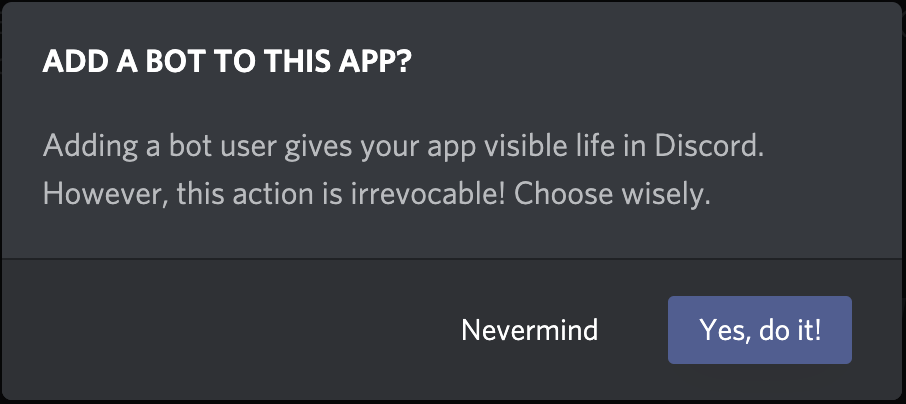
- Agree to add your bot to the app:
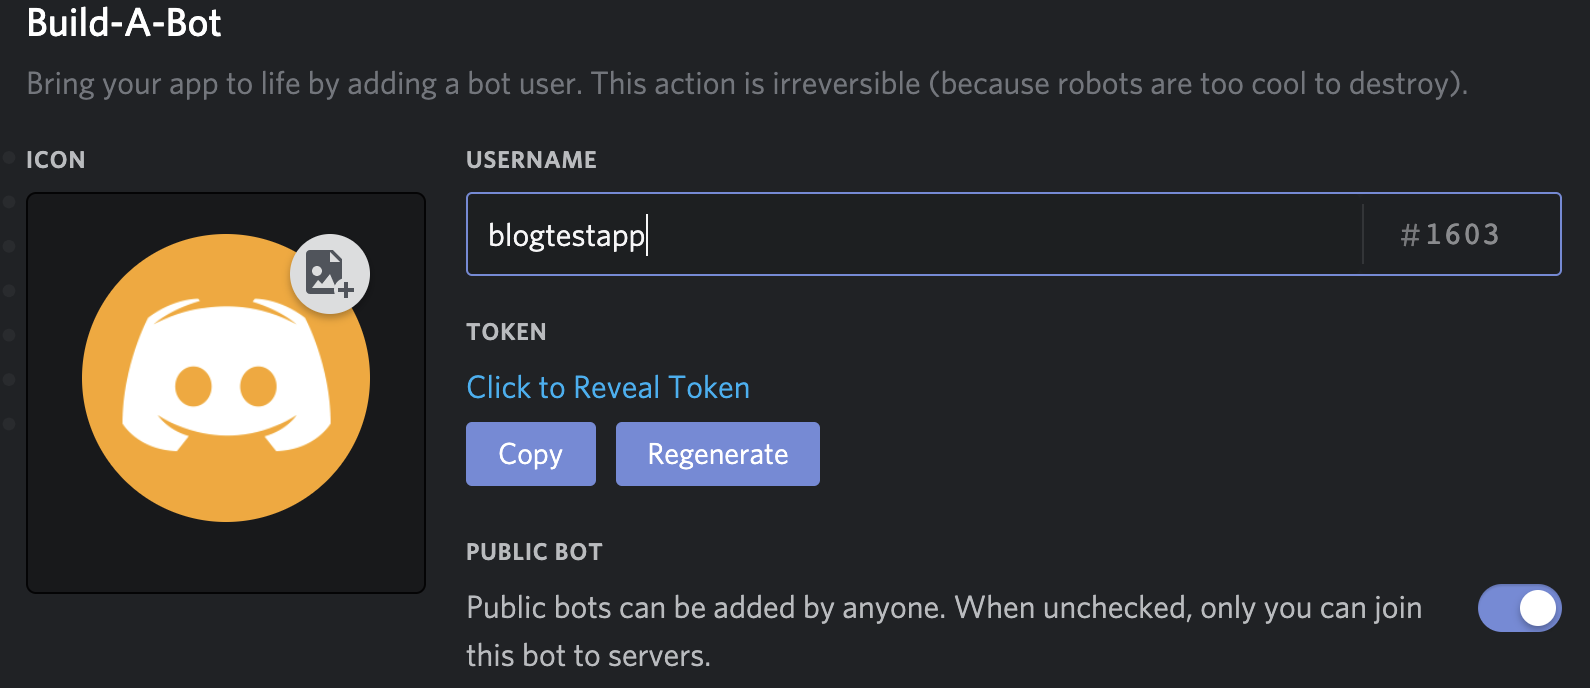
- Click the 'Copy' button on your token as you will need it later when you configure your bot. Make sure you save this value off to a text file or somewhere you can get it later.
Grant your Bot permissions on your Discord Server
At this point, you've created a server in Discord and you created a bot. Now we have to give our bot permissions to the server.
- Navigate to the OAuth2 link in your Discord Application.
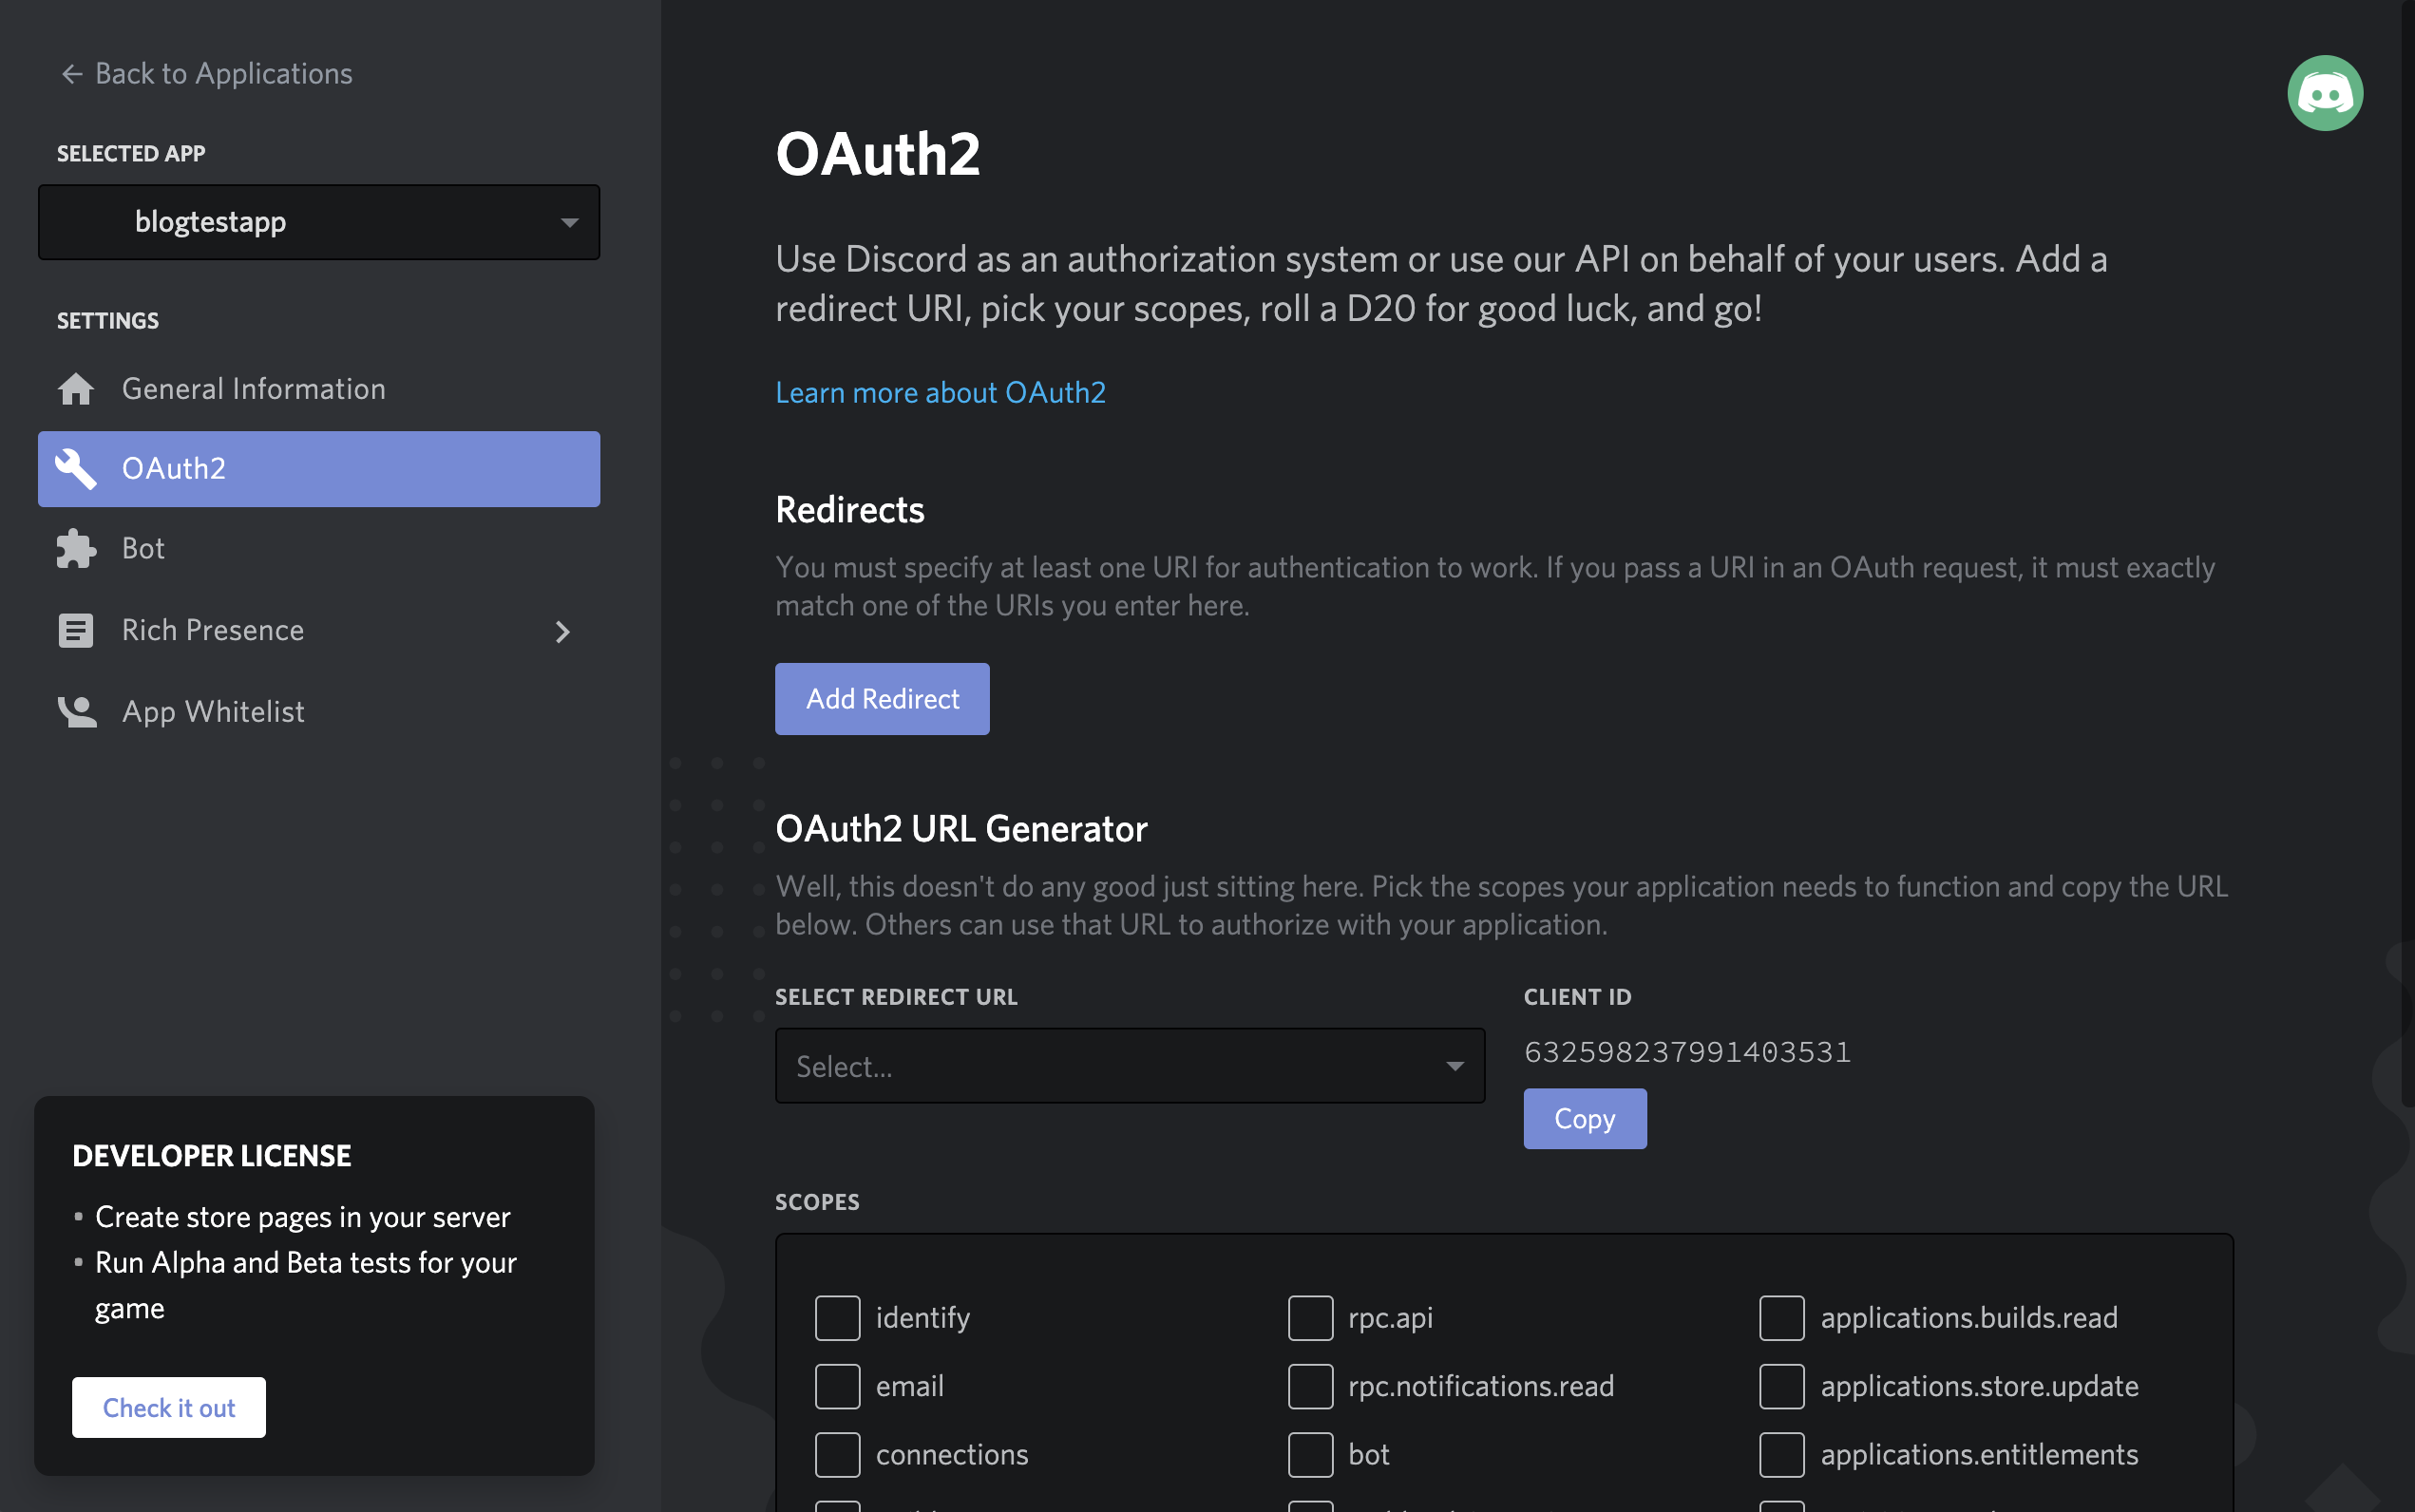
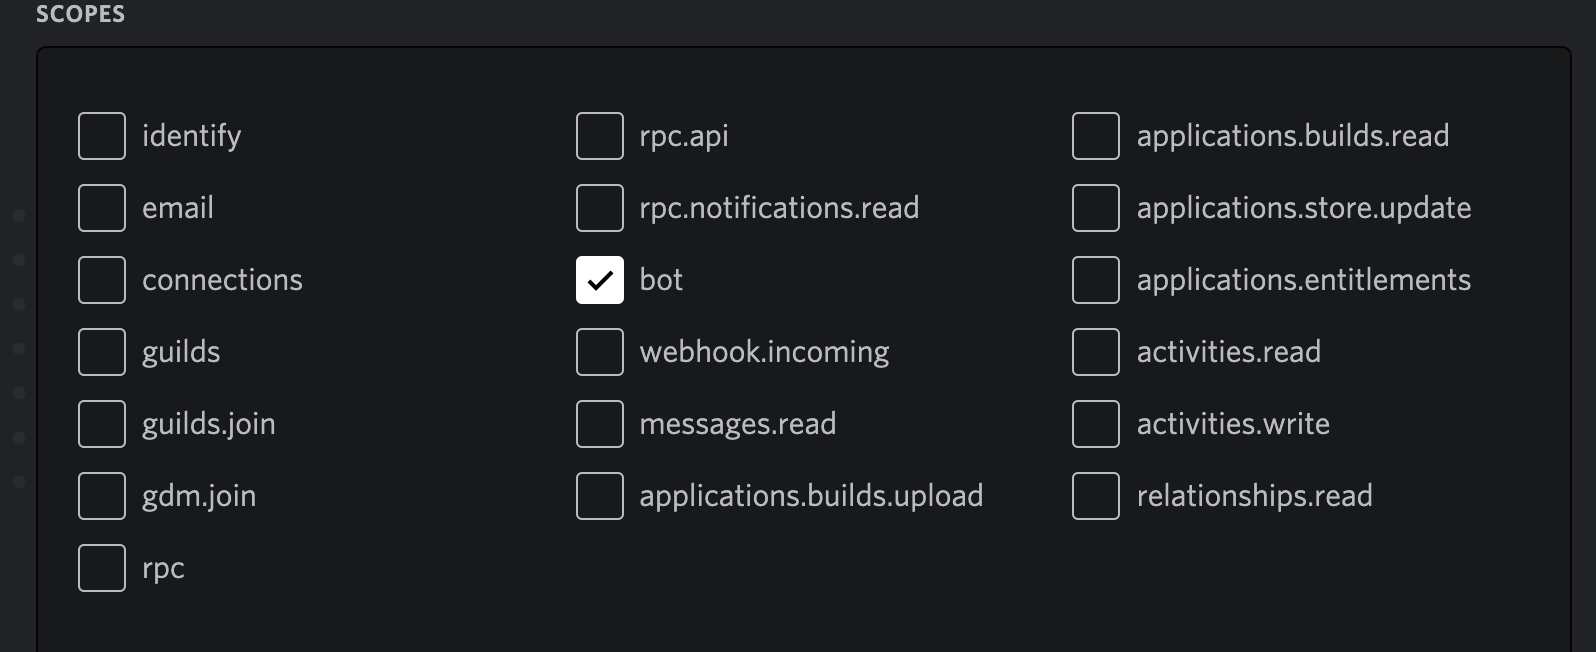
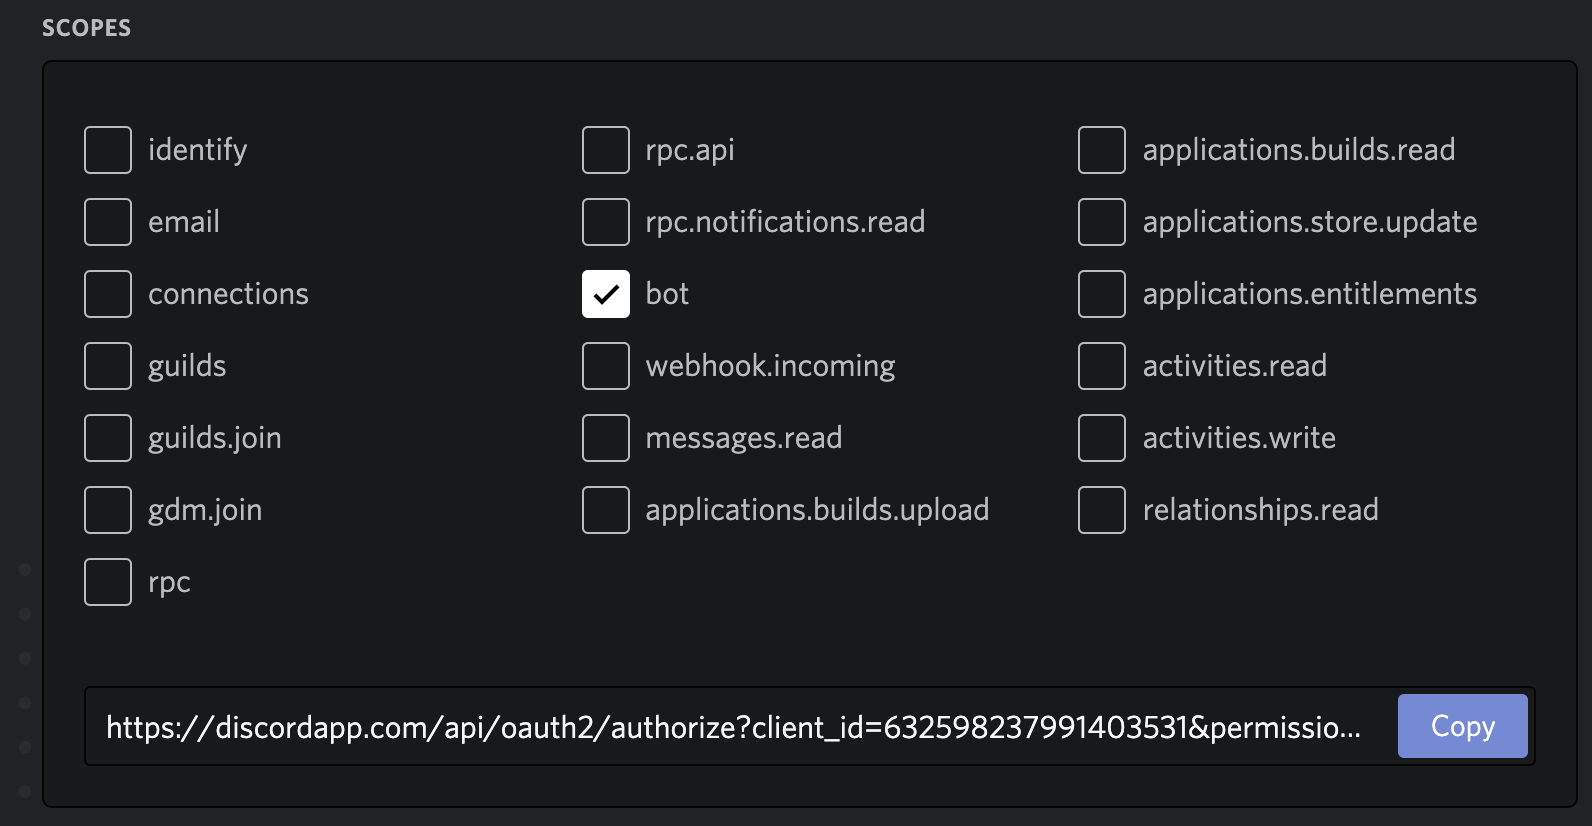
- In the list of scopes, select the bot scope
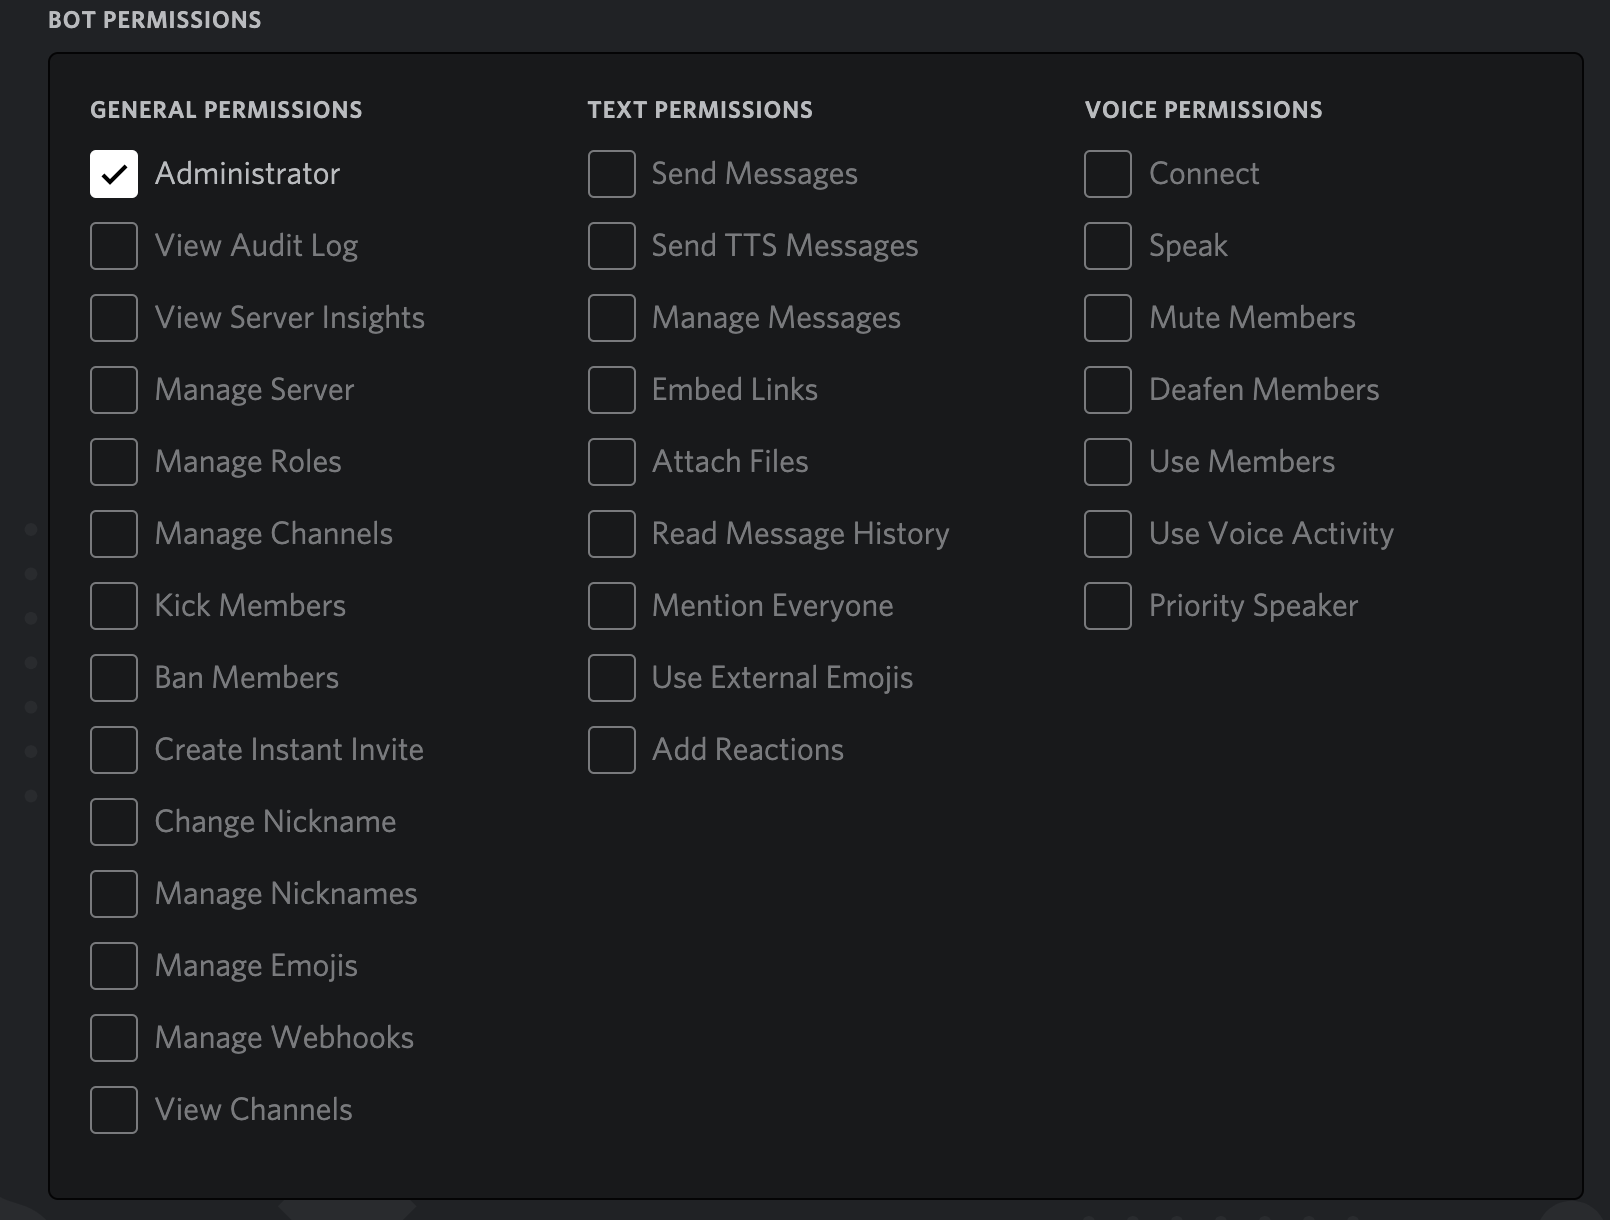
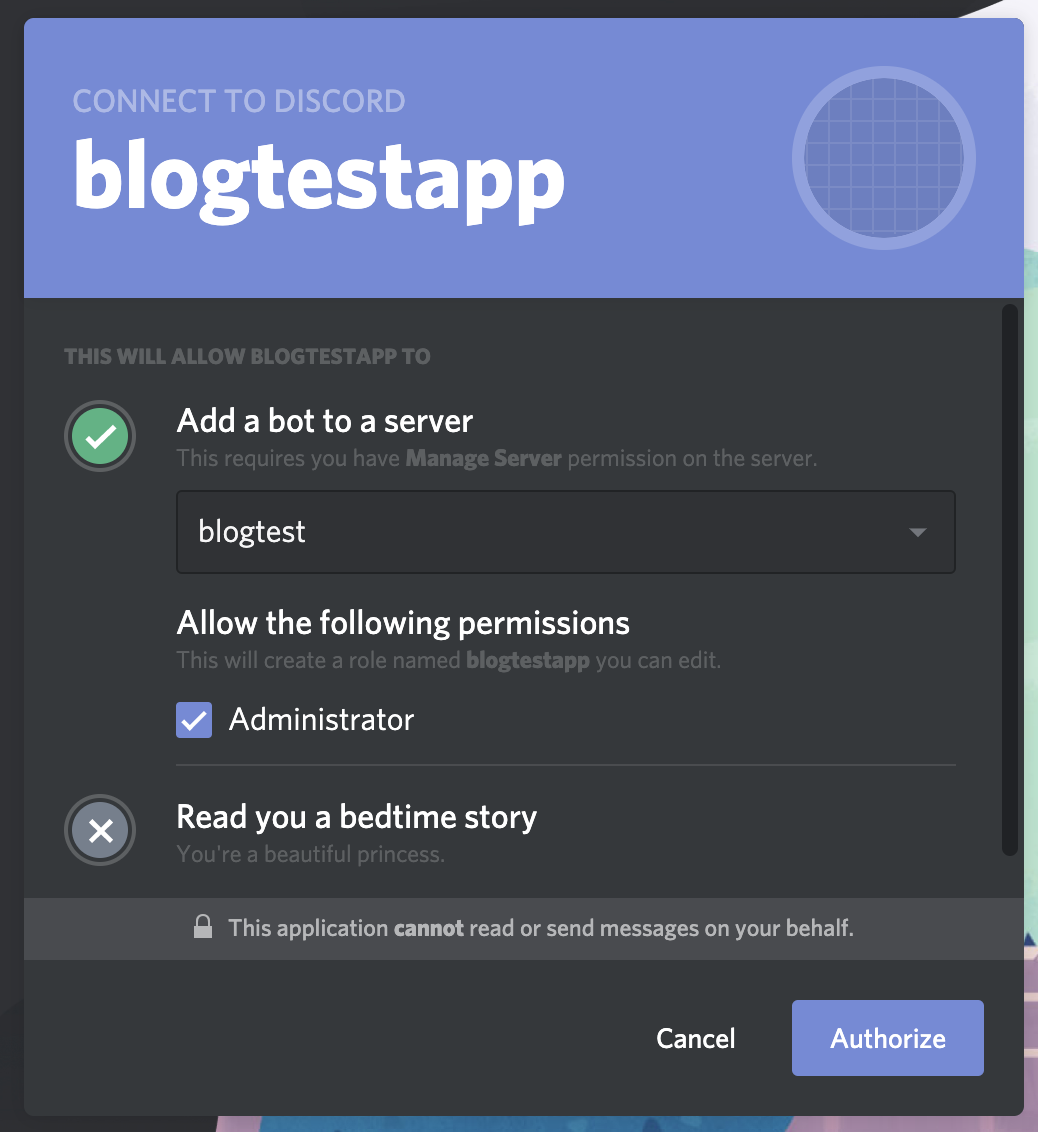
- Now go to the Bot Permissions and select Administrator:
- Now, copy the URL that is generated in the scopes section:
- Now, navigate to the URL that you copied, select the server you created and hit the authorize button:
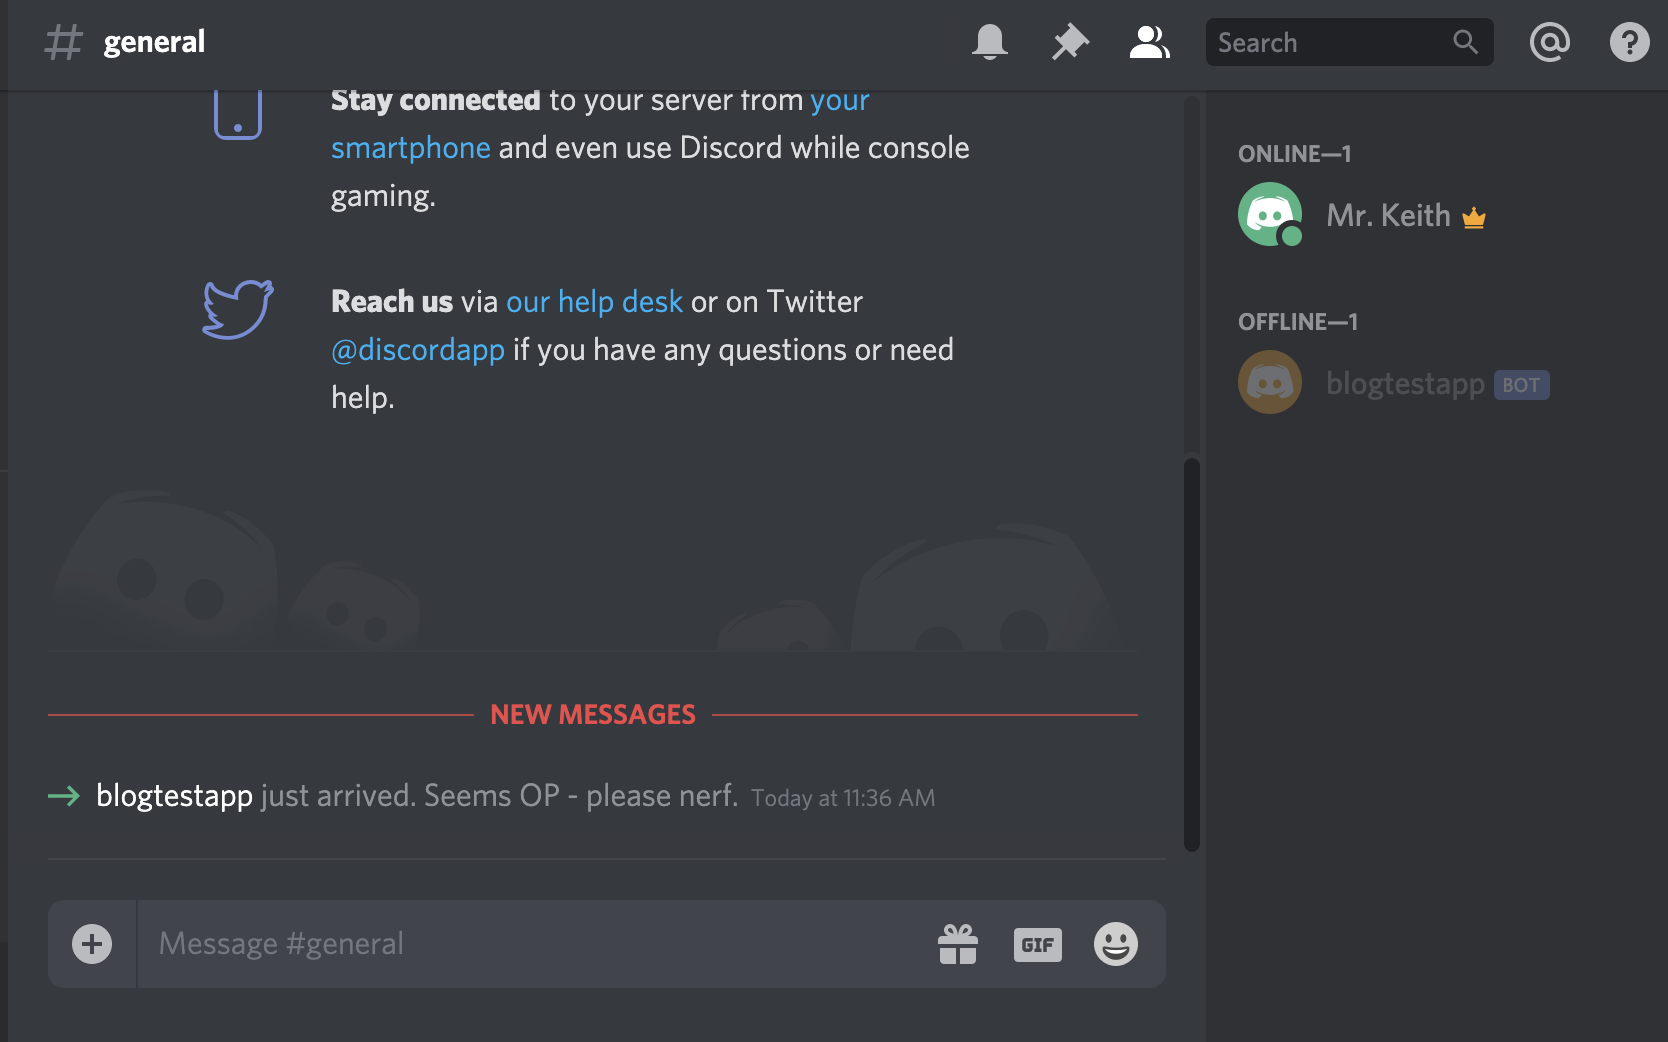
Now if you navigate back to Discord, you should see the bot listed in your Discord server as a member, however it will be offline.
Code your Discord Bot
Now, it's time to code our bot. You have a few options as to how do this. You can either write this on your local desktop and copy the file on to your Raspberry Pi, or you can write the code directly on your Raspberry Pi.
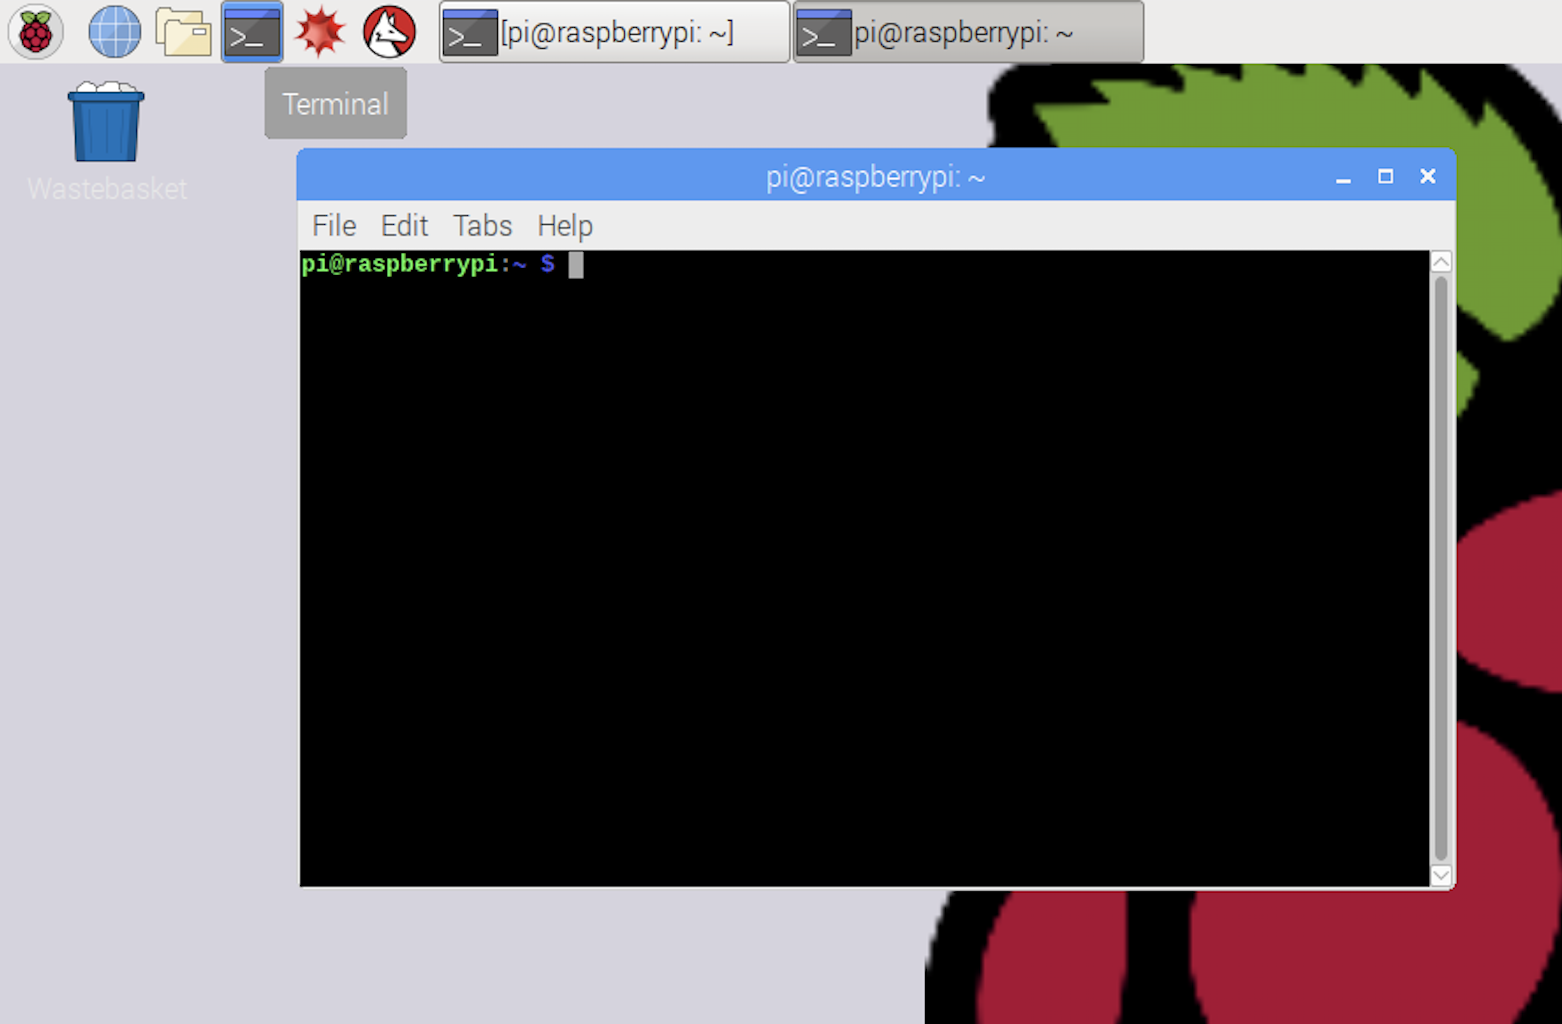
- On your Raspberry Pi, open up your terminal:
Install NodeJs
- In the terminal, run the following commands to install node:
curl -sL https://deb.nodesource.com/setup_10.x | sudo bash -
sudo apt install nodejs

# Verify your installation with the following command:
node --version

# Ensure version is v10 is installed- Next run the following commands to create a discordbot folder in your home folder, then changes the directory into it:
mkdir discordbot
cd discordbot- Now create a file called index.js using following command in the terminal:
touch index.js - Now open the file using a text editor on your Pi, we are using leafpad in our example.
// require the discord.js module
const Discord = require('discord.js');

// create the Discord client
const client = new Discord.Client();

// When the app is ready it will write out Ready using this
client.once('ready', () => {
	console.log('Ready!');
});

client.on('message', message => {
	if (message.content === '!Hello') {
        // send back "Pong." to the channel the message was sent in
        message.channel.send('hello to you too.');
	}
});

// Replace the value between the quotes with your token
client.login('your-token-goes-here');
Please be sure to replace the 'your-token-goes-here' with the token you saved above.
Create our NodeJs Bot Application
- Now we need to create a NodeJs application by using the npm init command. Hit enter for all of the defaults and type 'yes' at the end to accept the package.json details:
npm init- In order to use the require.js library, we need to add it to the list of packages in our application. We do this by adding the following command:
npm install discord.js- Now we run the npm install command to install dependencies:
npm installRun your Bot
Now the only thing we have left to do is run the bot. Use the following command:
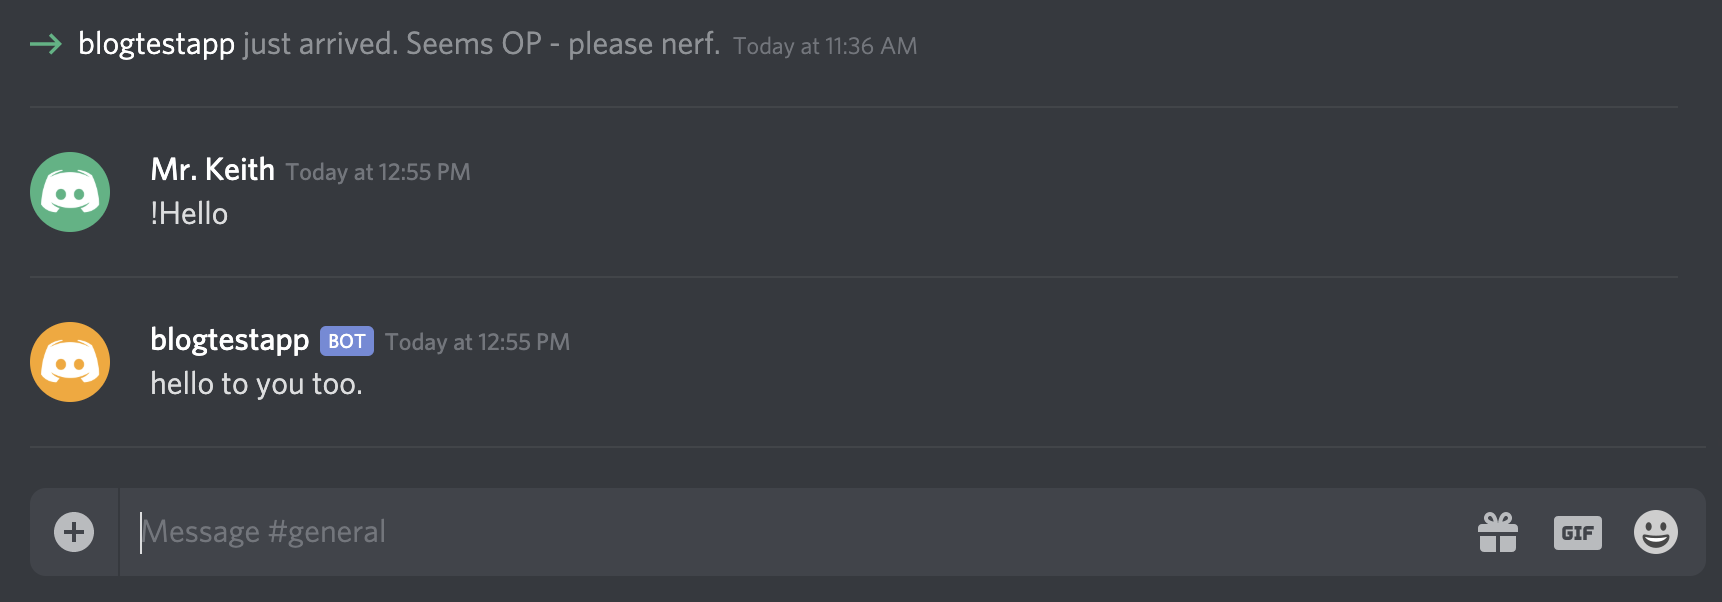
node index.jsThe terminal should say "Ready!" now and your bot is up and running. Let's test it out. Now head on over to your discord server chat and send the following message:
!HelloIf it's working, you should see the following response:
Summary
So there you have it! We have a functioning Discord Bot running on your Raspberry Pi. However, this is really just the beginning of what is possible. The next step would be to register your bot as a service to ensure it stays running in the case of a power reset but I'll save that for another post.
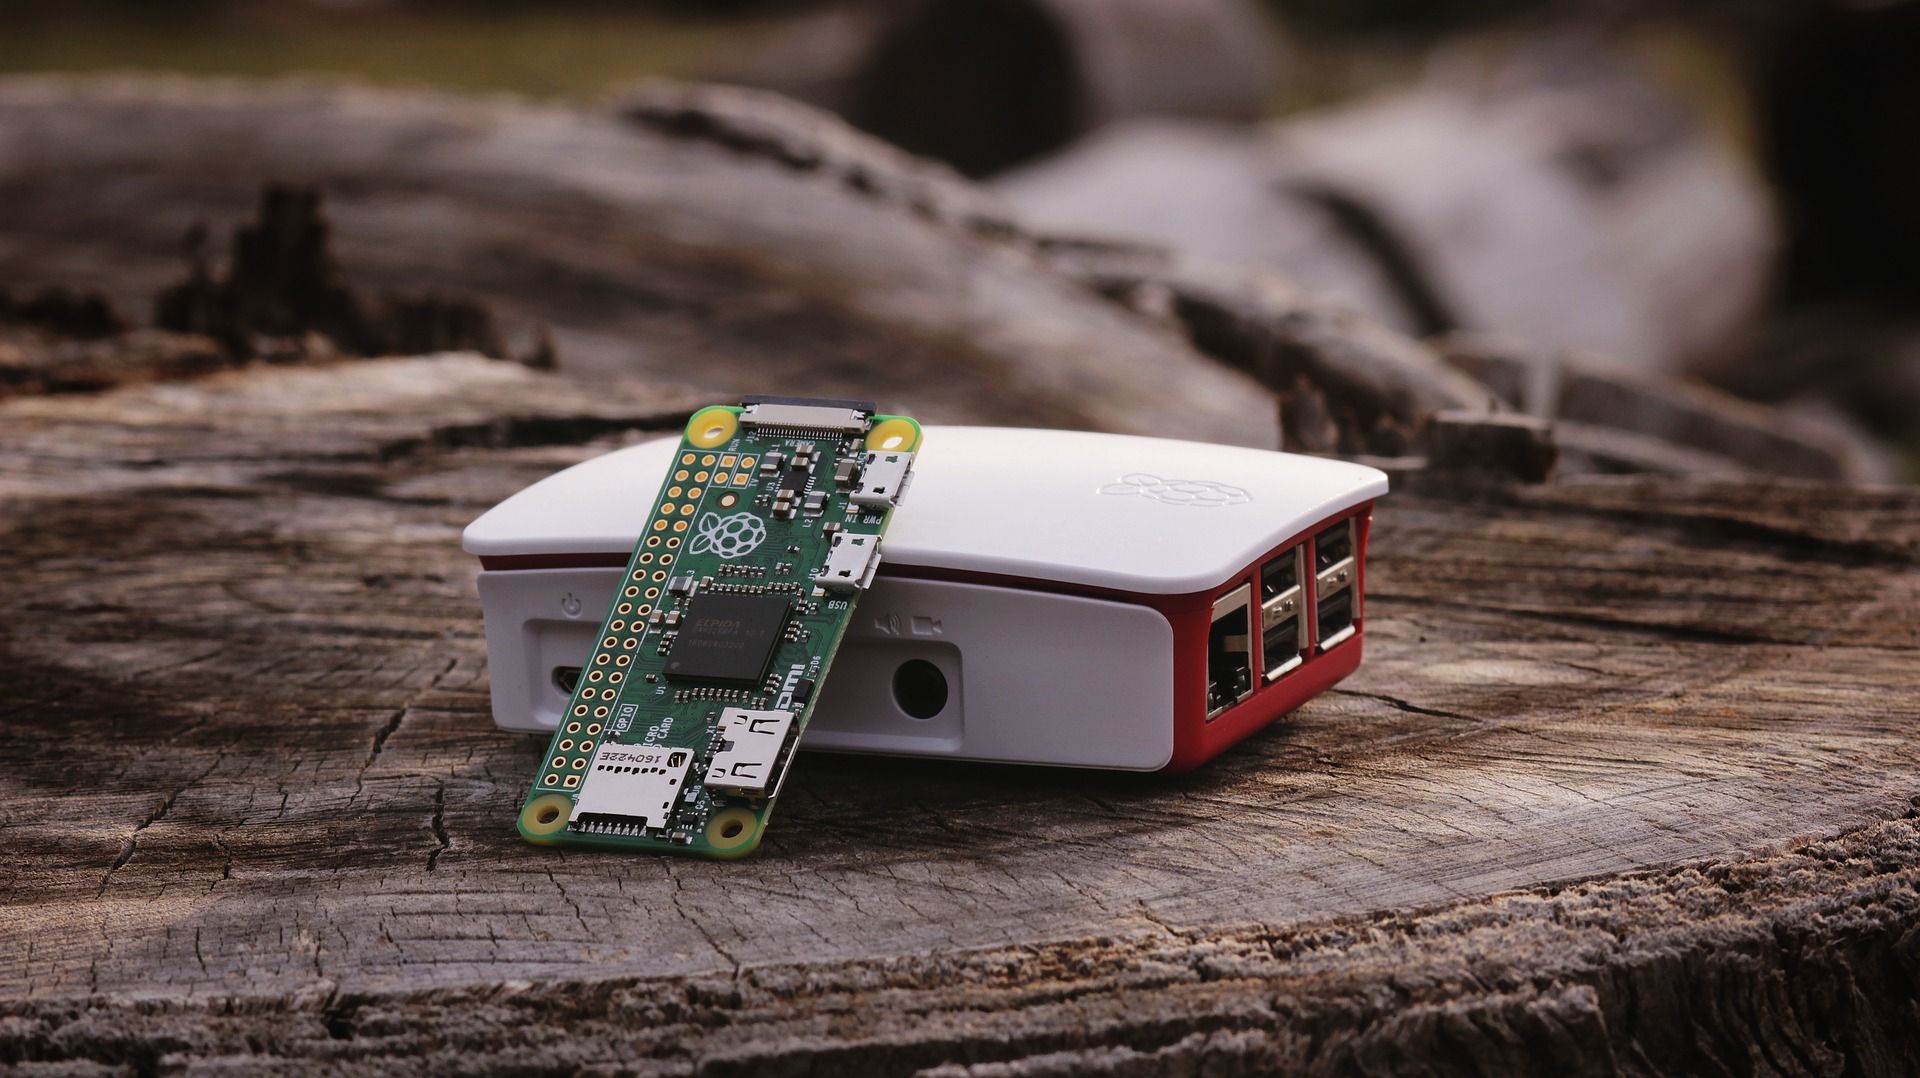
Image by Benjamin Nelan from Pixabay
As an Amazon Associate I earn from qualifying purchases which help support this site.